
Instructions · Ad
How to assemble and prepare a British Berkefeld gravity water filter
Prepare a British Berkefeld gravity system with correct tap seals, candle washers, blanked holes, first-use discarded water and clean handling.
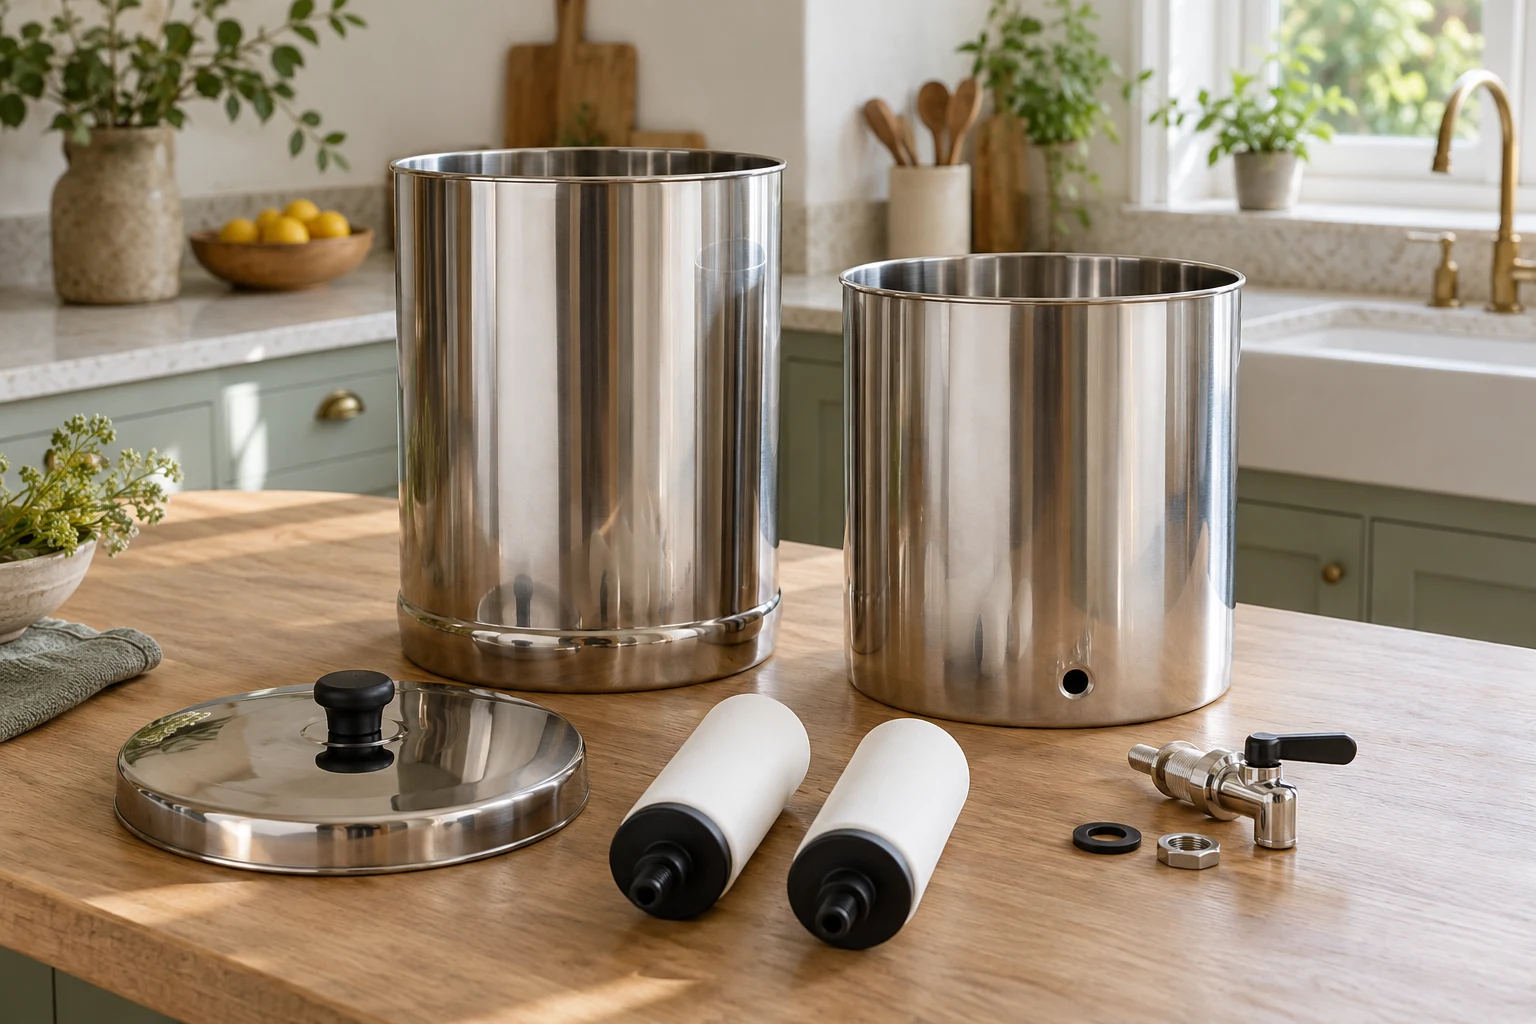
Before assembly: identify the exact set and prepare the work area
This guide covers the full-size British Berkefeld stainless-steel gravity format. The 1L personal system, other brands and pressurised Doulton housings can have different arrangements. Keep the instructions supplied with the vessel, candles and selected tap beside you throughout assembly.
Check the carton carefully for the lid knob, chambers, tap assembly, candle washers, wing nuts and any blanking parts. Doulton notes that some small fittings are bagged separately. Do not assume an absent-looking washer is unnecessary; locate it or obtain the correct part before adding water.
British Berkefeld 8.5L with two Ultra Sterasyl candles
A mid-sized British Berkefeld system with two Ultra Sterasyl candles and 7.8 litres of manufacturer-specified filtered storage.
- Filtered storage
- 7.8L
- Body H / diameter
- 500 / 224mm
Good forShared countertop serving.
Watch forA larger reservoir does not make water filter instantly.
Choose after checking its 500mm body height, 224mm diameter, refill access and the replacement cost of the fitted candle pair.
Choose a level, firm position that supports the whole base and allows safe filling above and dispensing below. Allow for a stand only if it matches the vessel. Empty assembly is the time to solve cupboard clearance, not after the tank contains several kilograms of water.
Wash your hands and clear a clean working surface. With candles removed, wash the metal chambers and appropriate plastic fittings using the housing manual’s hot-soapy-water routine, rinse thoroughly and dry. Keep the ceramic candles out of that wash: the instructions explicitly say not to wash new elements before use.
Fit the lid and the tap supplied with your system
Fit the lid knob according to the diagram, hand tightening rather than applying unnecessary force. Check that small screws or washers are seated as intended and that the lid can be lifted comfortably. The knob is not a carrying handle for a full assembled vessel.
For the standard SS2 tap, the illustrated arrangement places a rubber washer on the tap thread outside the lower chamber, with the second washer and retaining nut inside. The instructions describe moistening the rubber washers with clean water. Follow that model’s tightening sequence and keep the outlet upright.
A separate stainless-steel tap may have its own supplied fittings and instructions. Do not copy a plastic-tap tightening movement onto a different assembly without checking. Match the tap and seals to the selected body, and avoid using improvised sealants or adapters to compensate for the wrong parts.
British Berkefeld stainless-steel gravity tap
The named British Berkefeld steel replacement tap specified for its 6L, 8.5L and 12L stainless gravity vessels.
- Fits
- 6L / 8.5L / 12L
- Excludes
- 1L personal system
Good forA matched tap replacement.
Watch forConfirm seal and fitting contents; no improvised adapters.
Relevant for an identified damaged or unsuitable tap after checking its seals and assembly. It does not change the filtration rate through ceramic candles.
The named steel tap is intended for British Berkefeld 6L, 8.5L and 12L systems, not the 1L personal model. It changes the dispensing component; it does not increase filtration through the ceramic. Check which tap your starter bundle already includes before buying another.
Fit candle washers and close unused positions
Verify the candle grade before removing its protective packaging. Ultra Sterasyl 8674 and Ultra Fluoride 8B76 must not be mixed within the system. Confirm the installed count is supported by the housing and that any unused positions have the specified blanking parts.
British Berkefeld Ultra Sterasyl 8674, two-pack
Two British Berkefeld Ultra Sterasyl ceramic gravity candles, with the documented 8674 identity; a replacement pair for a correctly matched system.
- Identity
- 8674 / W9121226
- Pack
- 2 gravity candles
Good forReplacing a confirmed Ultra Sterasyl pair.
Watch forNot Biotect Ultra; do not mix with Ultra Fluoride.
Choose for the confirmed gravity housing and same-grade configuration. Cleaning may restore flow but does not reset the replacement schedule.
- Place the sealing washer over each candle’s threaded mount as shown in the candle instructions.
- Pass the mount down through the correct hole in the base of the upper chamber.
- Secure from below using the supplied wing nut, without overtightening or stressing the ceramic.
- Check that each candle sits correctly and that washers are not missing, folded or trapped against debris.
- Fit the proper blanking components to unused holes in the supported arrangement.
A missing candle washer or open position can bypass the intended treatment path without producing a puddle on the worktop. A vessel holding water externally is therefore not proof that all water reaching the bottom has passed through a candle. Inspect the assembly before conditioning.
Protect the threaded outlet from dirty hands, sink water and untreated water. The outside ceramic surface is exposed to feed water in use, but the outlet leads to the filtered side. Place components on a clean surface while arranging the chambers.
Condition the new candles and discard the specified first water
Close the dispensing tap, seat the upper chamber on the lower one and fill with cold water within the supplied instructions. Do not spill untreated water down the outside into the lower chamber. If a spill occurs, stop and clean the affected area rather than assuming the outside of a steel vessel is a barrier to contamination.
The candle leaflet and the exact SS2 instructions provide the fuller first-use sequence: let the first fill filter through and discard it. Rinse or wipe the lower chamber as directed to remove initial dust, then repeat with at least one litre per fitted candle, continuing until the water is clear. Two fitted candles therefore require at least two litres in that repeated flushing step.
New carbon-containing candles can release initial particles into this discarded water. Do not skip the conditioning because the first water appears clear, and do not assume continuing or newly appearing particles after preparation are always harmless manufacturing dust. Investigate persistent changes.
Full saturation and maximum normal flow can take two or three chamber fills. This is a separate consideration from the minimum discard routine. Allow time for setup rather than forcing water through with pressure, using hot water or scrubbing a new candle to hurry it along.
Check the first use before settling into a refill routine
Observe the tap opening and closing, its connection through the lower chamber, and the area around the nesting joint. Keep a clean dry cloth available so a new wet patch can be located. Empty the system before correcting a fitting; do not turn a full vessel over to reach a nut.
Check lower-chamber space before each upper refill. A tank that still contains filtered water can overflow as more arrives from above. Do not seal the nesting joint, drill holes or improvise an automatic shutoff to work around a mistaken refill routine.
Record the candle grade, installed count and start month, then follow the applicable replacement limits. Use the housing cleaning guide for routine upkeep, slow-flow checks for a changed rate, and leak diagnosis if a fitting or overflow remains unresolved.
Common questions
Should I wash new ceramic candles with washing-up liquid?
No. The system instructions say not to wash ceramic elements before use and never to use soap or detergent on the ceramic. Wash the housing and appropriate loose fittings separately, then condition the new candles as instructed.
Which side of the upper chamber gets the candle washer?
The sealing washer goes over the candle’s threaded stem before it is passed through the upper chamber base. The wing nut secures the stem from beneath. Follow the exact illustrated instructions for your model.
What should happen to unused candle holes?
Use the correct supplied blanking parts where a supported configuration leaves positions unused. An open hole can pass unfiltered water into the lower chamber.
How much first-use water should be discarded?
The candle and SS2 instructions call for discarding the first filtered fill, cleaning the lower chamber, then repeating with at least one litre per fitted candle and continuing until clear. Follow the current instructions supplied with your exact set.
Can I pressure-prime a candle under the kitchen tap?
Do not improvise a pressurised priming method. The cited British Berkefeld gravity instructions use cold-water conditioning through the assembled system. Ask Doulton if the specified process does not restore expected operation.
Sources and further reading
- British Berkefeld: stainless-steel gravity system operating and cleaning instructions
- British Berkefeld: exact 8.5L SS2 Ultra Sterasyl system instructions and performance sheet
- British Berkefeld: W9121226 Ultra Sterasyl candle fitting and conditioning
- British Berkefeld: Ultra Fluoride candle preparation and care instructions
- British Berkefeld: stainless-steel tap fit for 6L, 8.5L and 12L systems